How to transition from Gmail/Office 365 to SMTP forwarding
Overview
If you currently have your inbox set up with Gmail or Office 365 sync, there may be cases where you want to move to email forwarding to ensure your sent emails are being retained. By default, outbound messages will be sent using Front's SendGrid mail servers.
Remove the channel (not the inbox!)
Step 1
Remove your existing Gmail/Office 365 channel by following these steps.
When you remove this channel, you’ll remove the connection to Front, allowing you to add it back again. Don't delete the inbox itself, or you will lose the history in Front.
Step 2
Once you’ve removed the original channel, you will re-add that same email address as a new channel to the existing inbox. Follow the steps below to re-add your Gmail or Office 365 inbox.
Set up email forwarding for inbound mail
Forwarding for Gmail
Step 1
Add the channel as a Google Group.
Step 2
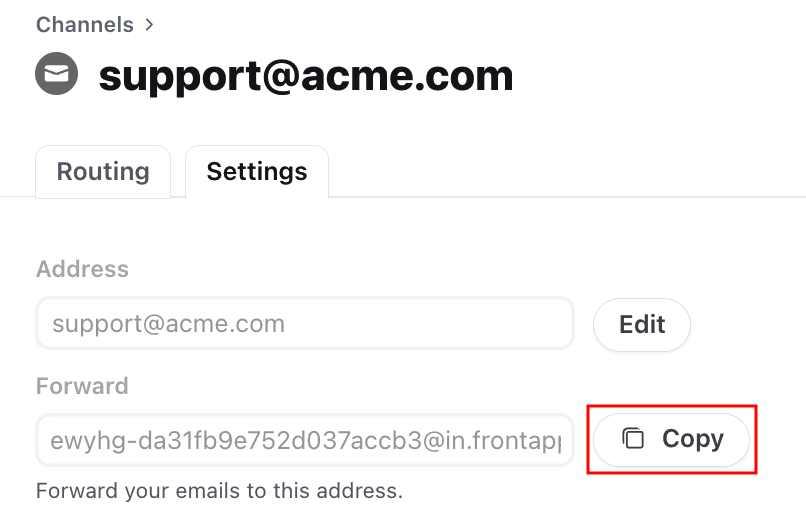
Copy the forwarding address generated.
Step 3
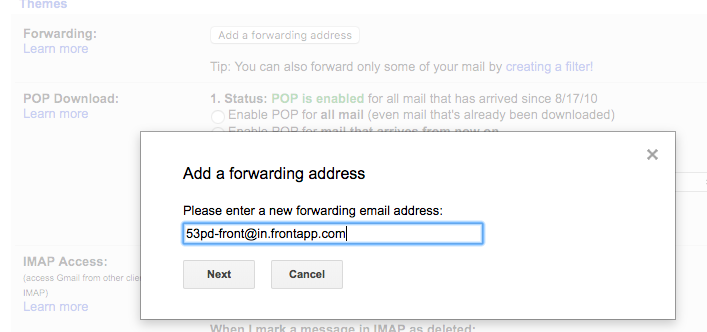
Add the forwarding address in your inbox settings in Gmail.
Stuck on where to configure forwarding in Gmail? Check out their guide here.
Step 4
You'll receive a verification email at the forwarding address in Front. Verify that mail is flowing to Front by sending a few test emails to your existing email address.
Forwarding for Office 365
Step 1
When adding the new channel, select Other email account as your channel type, then type in your email address when prompted.
Step 2
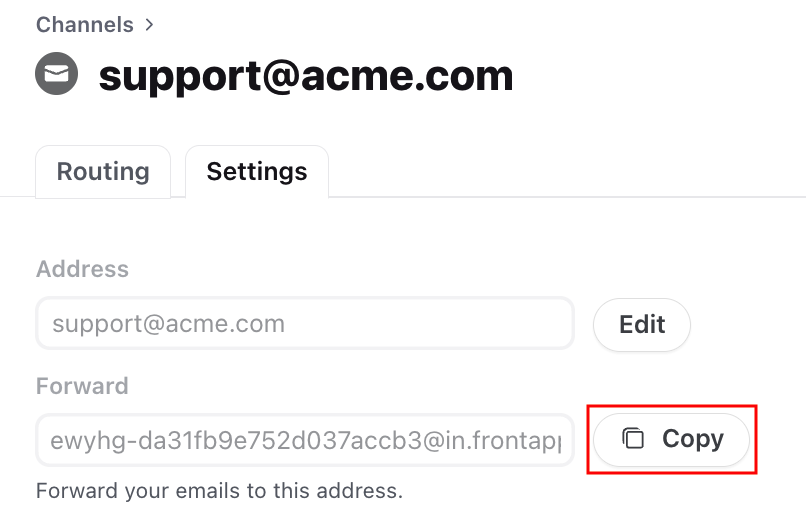
Copy the forwarding address.
Step 3
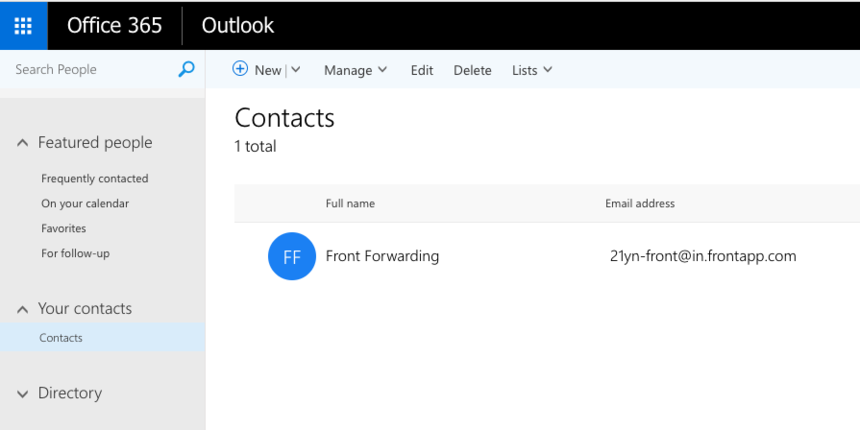
In your Office 365 account, head to the People section, and add a new contact. For the email address, paste the forwarding address that you copied in Step 2.
Step 4
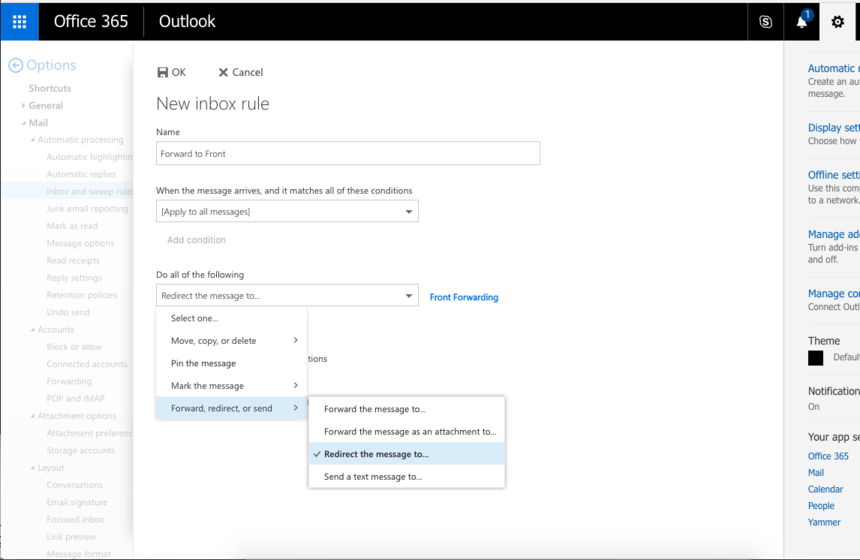
Create a new inbox rule in Office 365. Go to Mail > Settings > Inbox and Sweep Rules and redirect to the contact you created.
Step 5
Go back to Front and Send email to verify the forwarding.
Add custom SMTP for outbound mail (optional)
Custom SMTP allows mail to be routed through your mail server outbound so you retain a copy of your delivered mail outside of Front, just as you used to with your existing connection. This can help IT or Security members see messages being sent using Front who don't have a Front license. This is not a required step but is highly recommended. Learn more about custom SMTP here.
If you do not configure a custom SMTP connection for your mailbox, mail will be sent using Front's default SendGrid servers. If you see "via sendgrid.net" in your new outbound mail, you may need to review your deliverability settings.
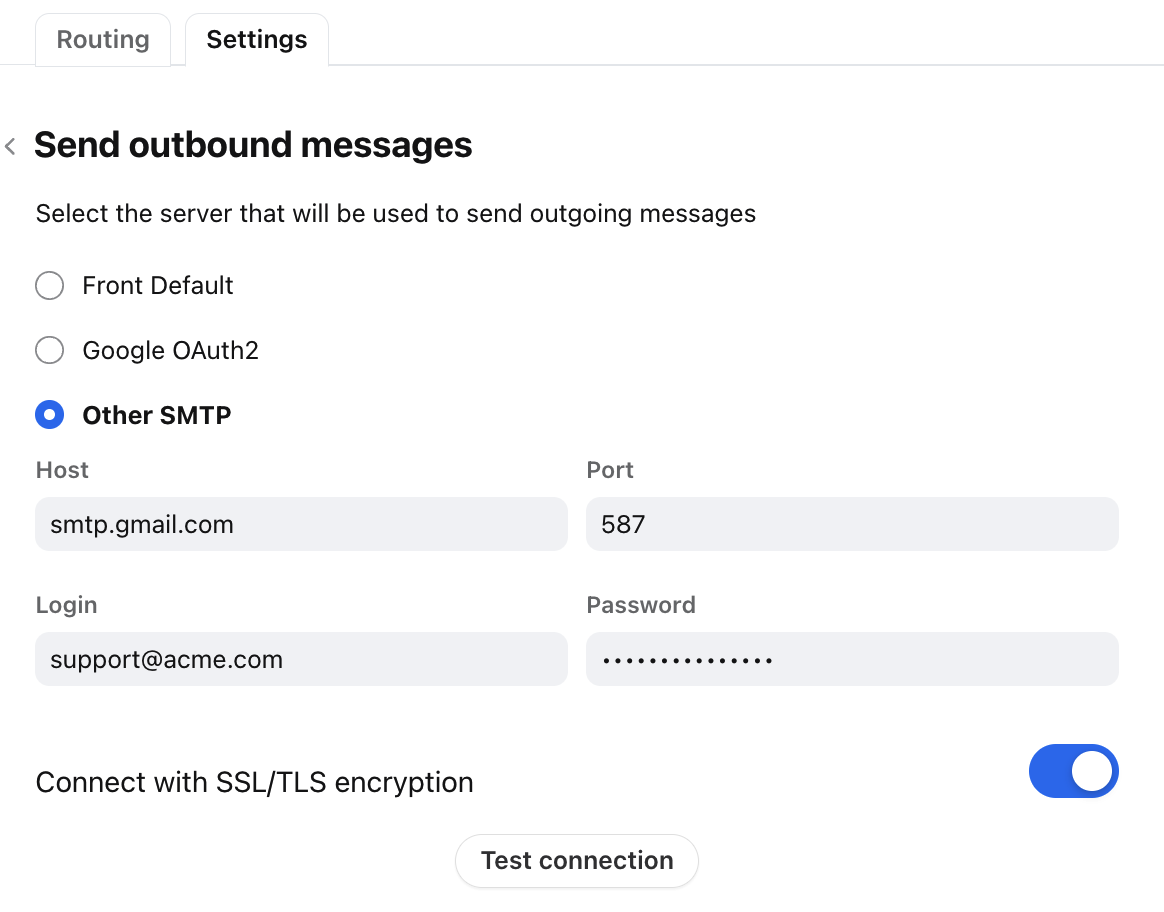
Custom SMTP for Gmail
Gmail provides two options for routing mail through their SMTP servers. Utilizing their default SMTP server will allow you 2,000 outbound messages a day while utilizing SMTP relay may allow you a higher limit depending on your license count. To confirm which option is best for you, see Google's guidance here.
Host: either smtp.gmail.com or smtp-relay.gmail.com (see guide above)
Port: either 587 (SSL/TLS) or 465 (Non-Encrypted)
Login: the email address of the account
Password: the password of the account. Configure an app password to bypass two-factor authentication.
It is highly recommended that you utilize Port 587 and connect using SSL/TLS.
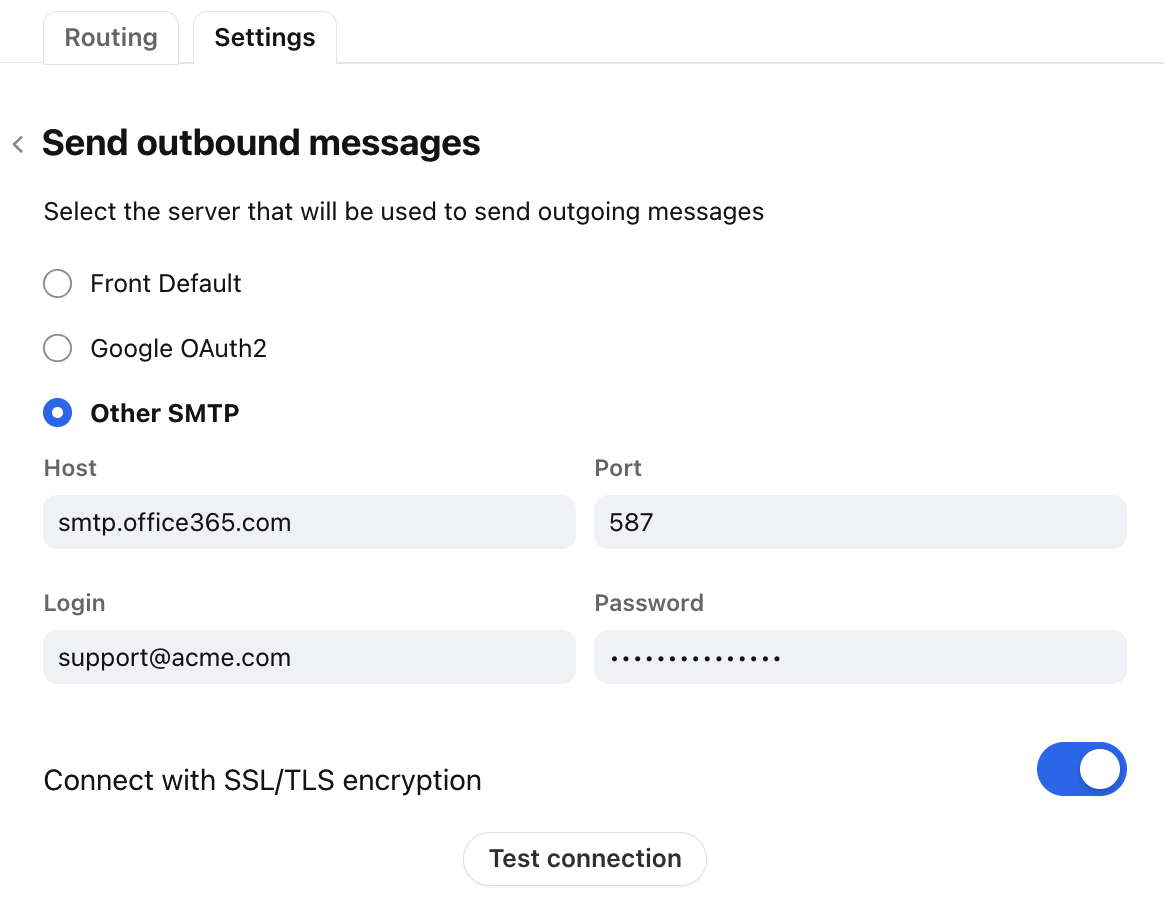
Custom SMTP for Office 365
For more information on the SMTP sending limits for Office 365 please see here. For Microsoft's guidance on SMTP sending options, see here.
Host: smtp.office365.com
Port: 587 (SSL/TLS) or 465 (Non-Encrypted)
Login: the email address of an account that has sending permissions. We recommend utilizing a singular service account if you'll be configuring multiple SMTP connections in Front.
Password: the password of the email address above. Configure an app password to bypass two-factor authentication)
Pricing
This feature is available on all plans. For the latest Starter plan, you must have email set as your company's channel type.

