How to enable and use the Zoho CRM integration
Overview
Zoho CRM helps sales teams manage their accounts and deals efficiently to close more deals, faster. Support for tracking customer conversations across email, calls, live chat, and social media make it easy for your team to see every customer interaction and manage sales processes at scale.
This integration allows you to view, update, and create Zoho leads, accounts, contacts, and deals directly in Front for Zoho CRM accounts on all data center regions, and should work to find accounts by both email and phone number.
Prerequisites
Front expects the following Zoho CRM modules to be active and accessible for users logging into the plugin:
Leads
Contacts
Accounts
Deals
Cases (available in Zoho CRM Professional edition and higher)
Tasks
Modules are only active and accessible if they are shown as tabs for that user. Please see this Zoho CRM help article on Tab Settings for instructions on enabling the above modules.
To ensure the Deals section displays in the plugin:
Contacts need to be associated with an Account
Deals need to be attached to the corresponding Account
If no Account is attached to the Contact, the Deals section will not load
Instructions
Step 1
Click the gear icon, navigate to company settings, then select App store from the left menu.
Step 2
Select Zoho from the list of integrations. Click See details, then click Enable app.
Step 3
Click Start using this app to navigate to the app switcher in your sidebar.
Step 4
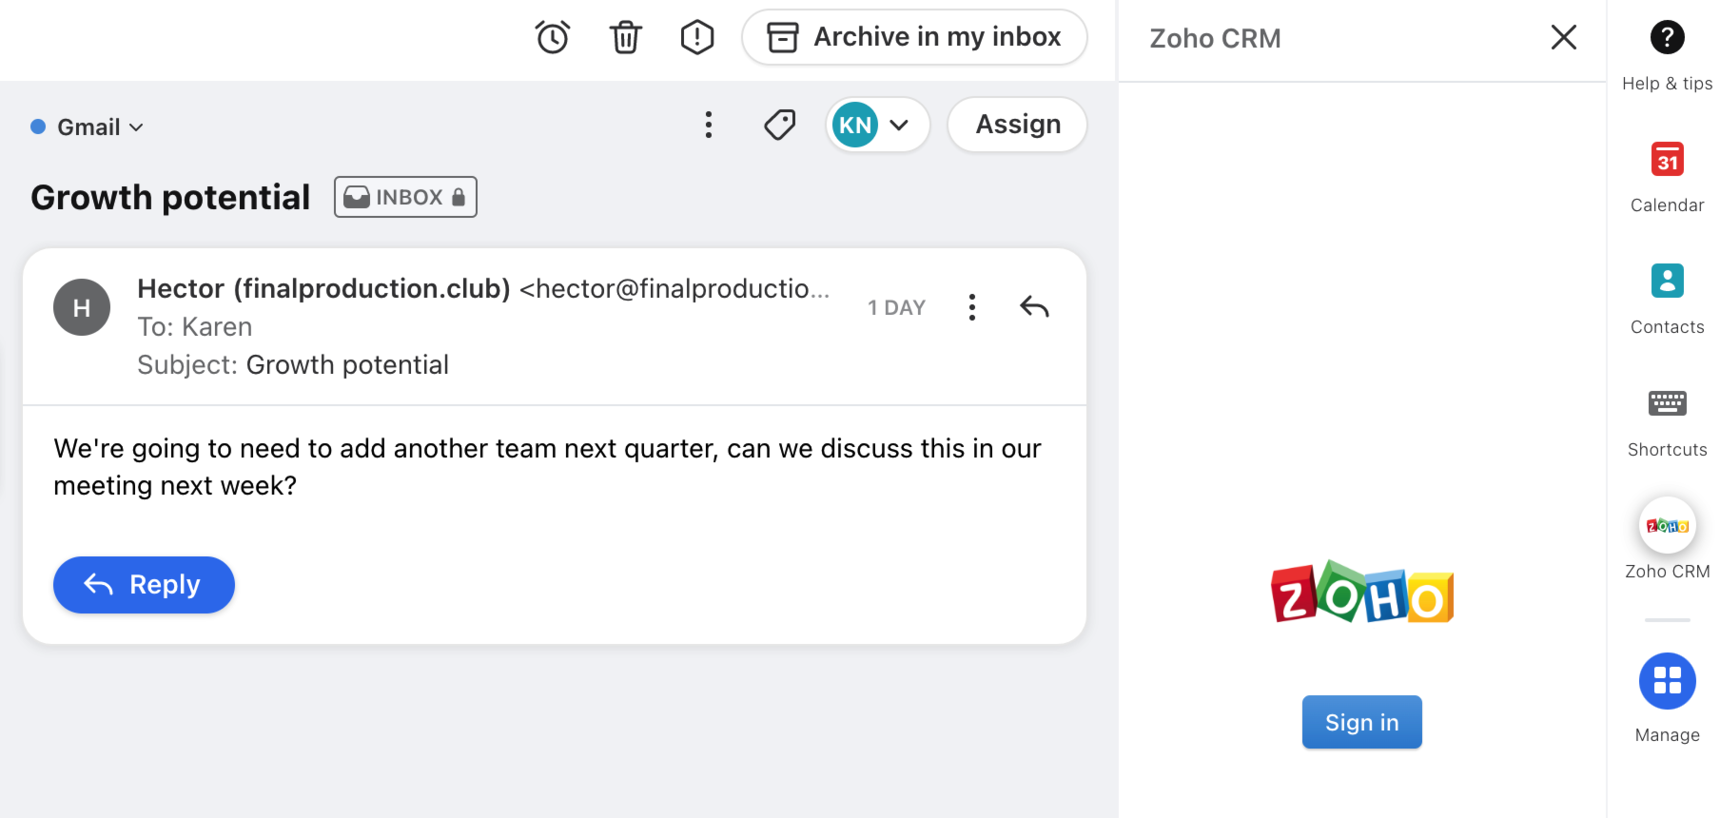
Sign into your Zoho account.
If you do not have two factor authentication enabled on your Zoho CRM account, enter your Zoho CRM account password and click Sign in, and skip to Step 12.
Step 5
If you have two factor authentication enabled on your Zoho CRM account, you’ll need to create an application specific password for the Front integration before signing in. You won’t be able to use your usual Zoho CRM account password to sign in to the integration.
Follow Steps 6 through 11 to create an application specific password for the Front integration.
Step 6
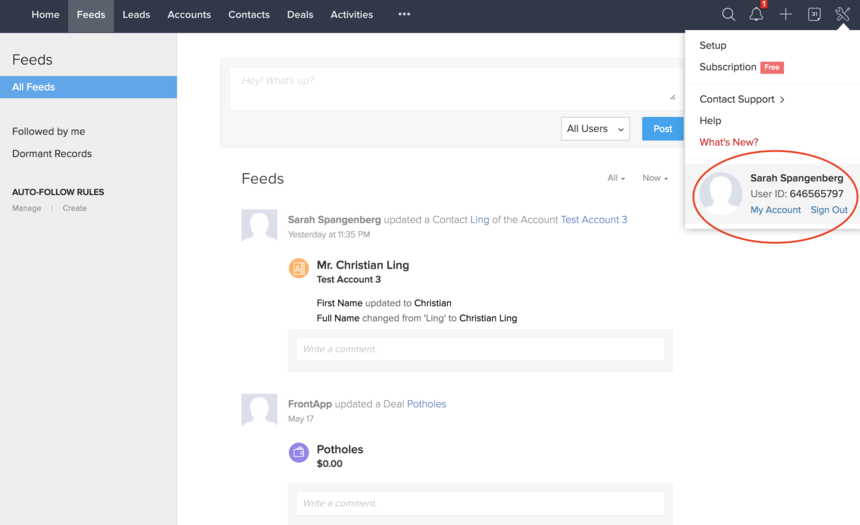
Open Zoho CRM in another window. Click on the tools icon in the upper right corner, and click on My Account.
Step 7
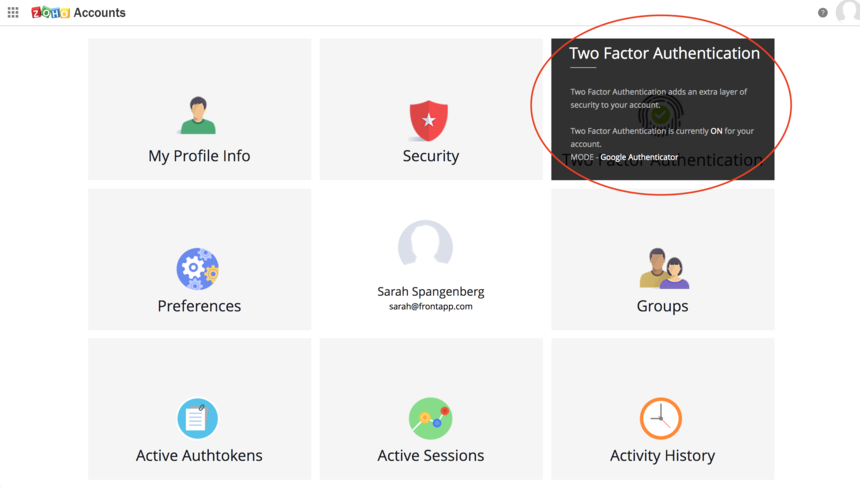
Select the tile for Two Factor Authentication in your account settings page.
Step 8
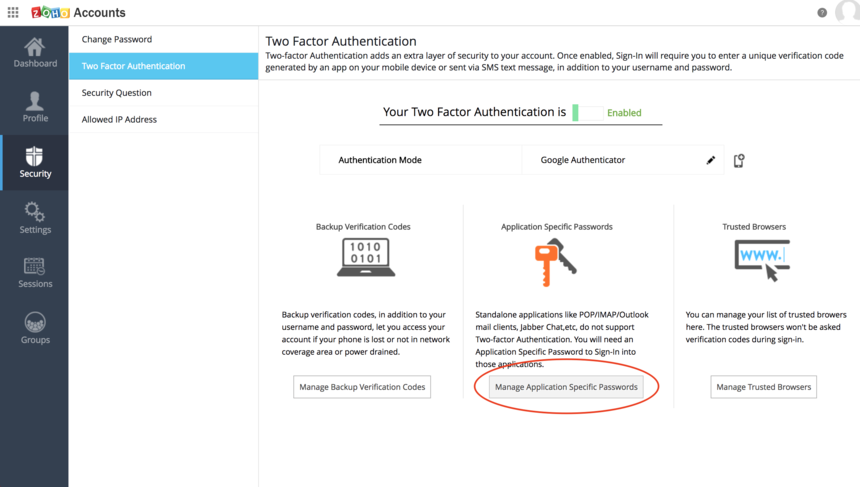
Click Manage Application Specific Passwords.
Step 9
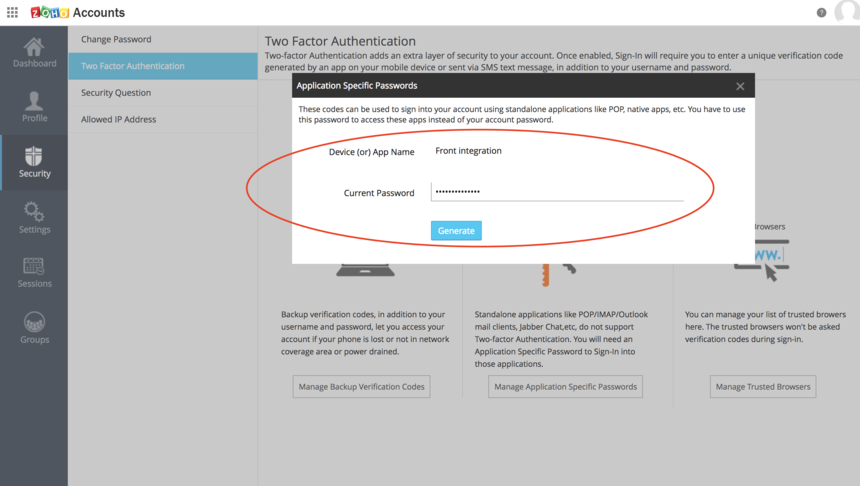
In the pop-up window, name your application specific password that you'll use to authenticate the Front integration. We suggest something like "Front integration" so it's easily recognizable.
Type in your usual Zoho CRM account password and click Generate.
Step 10
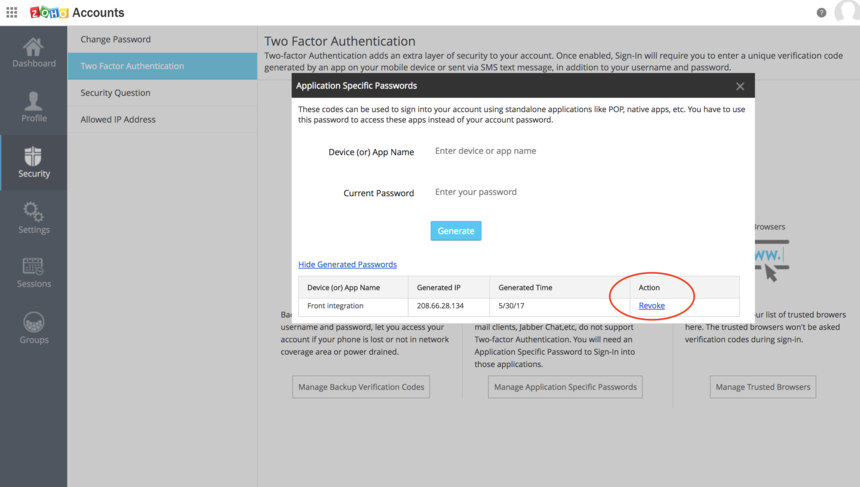
Copy the generated password and keep it somewhere safe. You'll need to use this to sign into the Zoho CRM integration in Front.
You can revoke this password at any time and repeat Steps 6 through 10 to change your application specific password for the Front integration.
Step 11
In Front's app switcher, enter your Zoho CRM account email and the application specific password that you just created into the plugin. Click Sign in.
Step 12
You can now display information about your Zoho CRM leads, contacts, deals, and accounts directly in Front. If the email address for your message does not match an existing Zoho CRM record, you’ll have the option to Create Lead or Create Contact.
Step 13
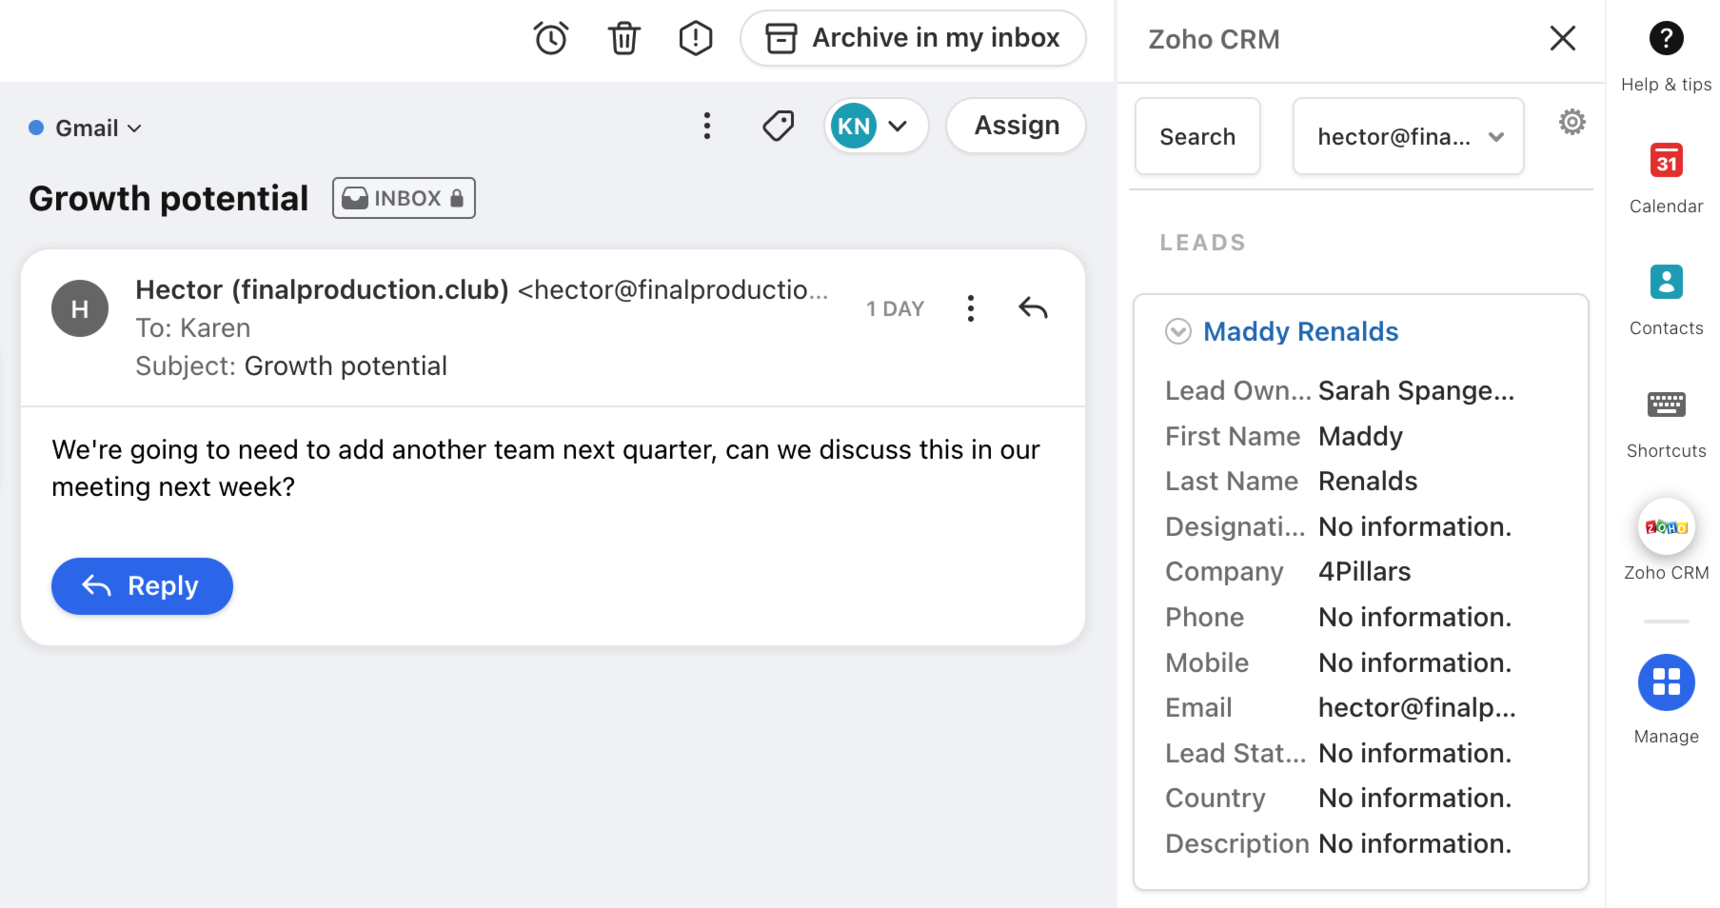
For any Front message, if there are any matching leads, accounts, or contacts in Zoho CRM, you will see contact information, status, and other data displayed for those records. You can edit most fields by clicking on them.
Step 14
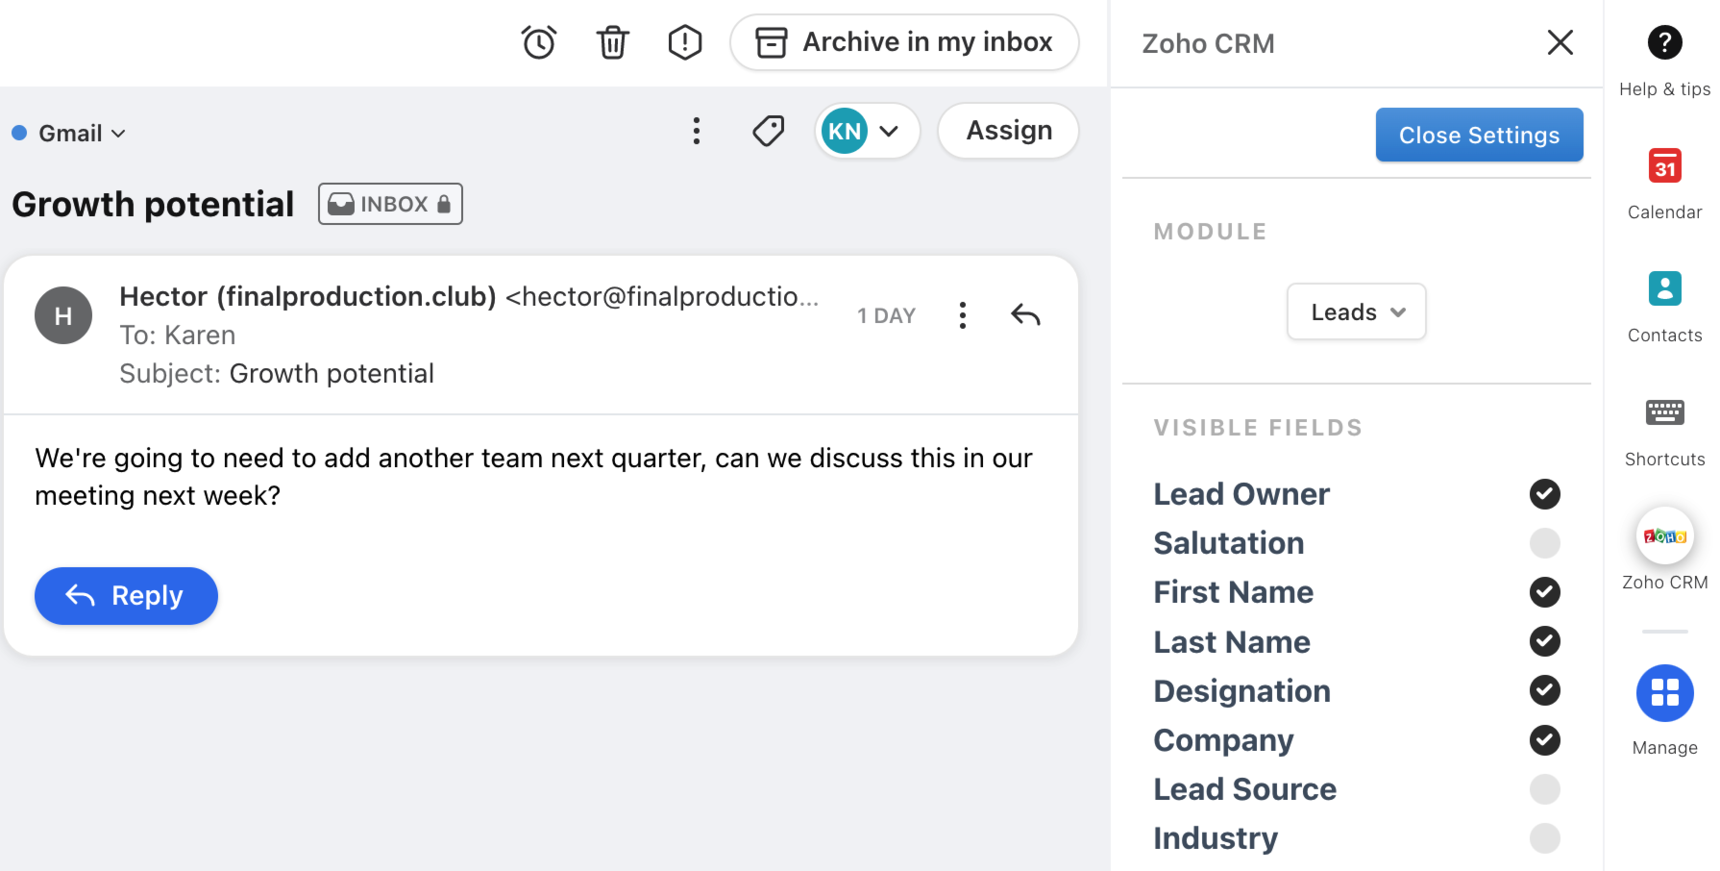
Customize which fields are displayed and editable in Front by clicking on the Settings button in the upper right corner of the integration panel. Choose your desired object from the dropdown, and check the fields you want to be displayed in Front.
Authtokens & Authentication failed errors
When logging in with either authentication method, you will see an Authentication failed error in Front if you have too many Active Authtokens on your Zoho account.
Zoho imposes a limit of 10 Active Authtokens for an account at any given time. If you have 10 active already, you'll need to remove some before you'll be able to grant one to Front and successfully sign in to the integration.
To clear your Authtokens, follow these instructions:
Step 1
Log in to your Zoho account here. You need to be an account admin to do manage authtokens.
Step 2
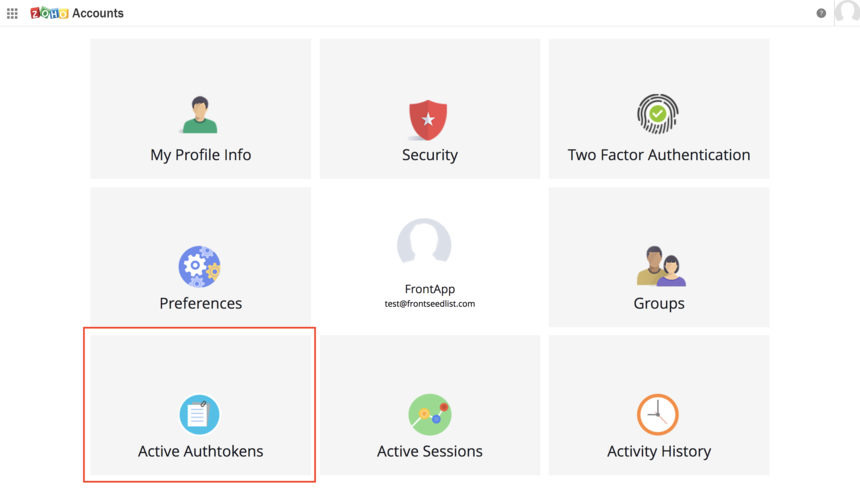
Click the Active Authtokens tile in the lower left corner.
Step 3
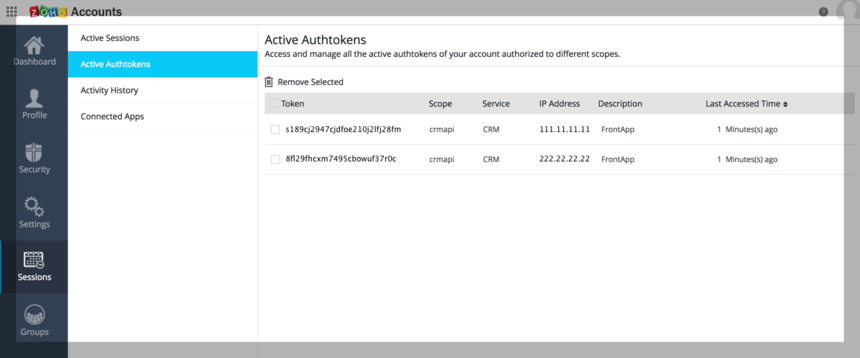
Then select Authtokens to delete and click Remove Selected.
You will need to have fewer than 10 Active Authtokens in order to successfully log in to the integration in Front.
Pricing
This feature is available on all plans.

